

This page may contain affiliate links, which means I will receive compensation if you click through and make a purchase.
I’d like to start off by saying: never in my life have I had SO many splinters. Totally worth it though.
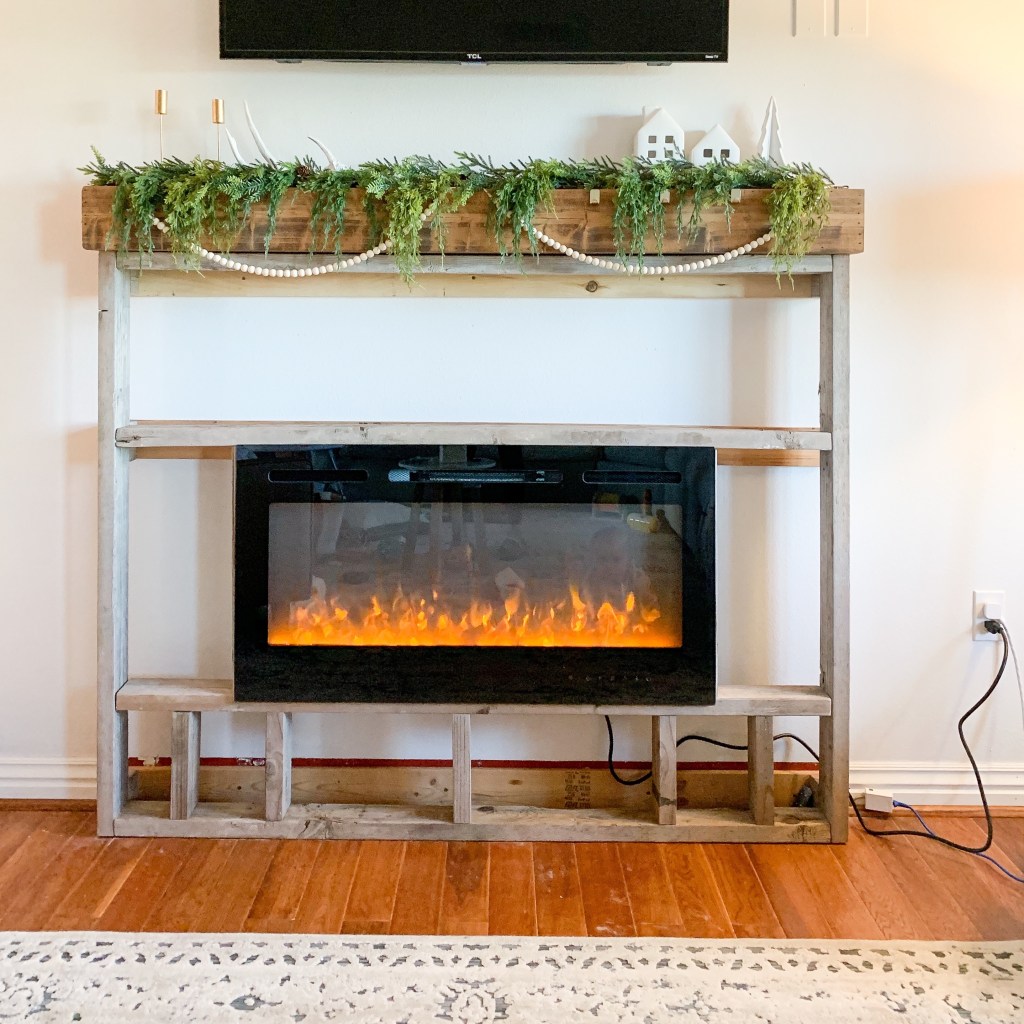
A fireplace was on our wishlist when we started shopping for our second home (our first didn’t have one either) but after 5 years of searching, this home was the closest we could get to meeting MOST of our wants within our budget – fireplace or not. After about a year of staring down our huge, blank tv wall I decided it was time to get to work.

I was intimidated at the thought of building something this substantial – but honestly, as long as you can measure and cut – you can build anything…the right tools help as well!
For this project we used the following:
• Protractor (for the cuts along the vaulted ceiling)
Not all of these are totally necessary, but they will make the project a whole lot easier. If you don’t have these you could always look into borrowing or renting from your local hardware store. Many hardware stores will rip plywood to size for you as well!
I’m not going to get specific with measurements because every space will be different – this is just an overview of the process.
We started off with the mantle which is actually a floating shelf that we purchased from All Modern. The exact one is linked here. You could easily build something like this with a few 1×6 boards.
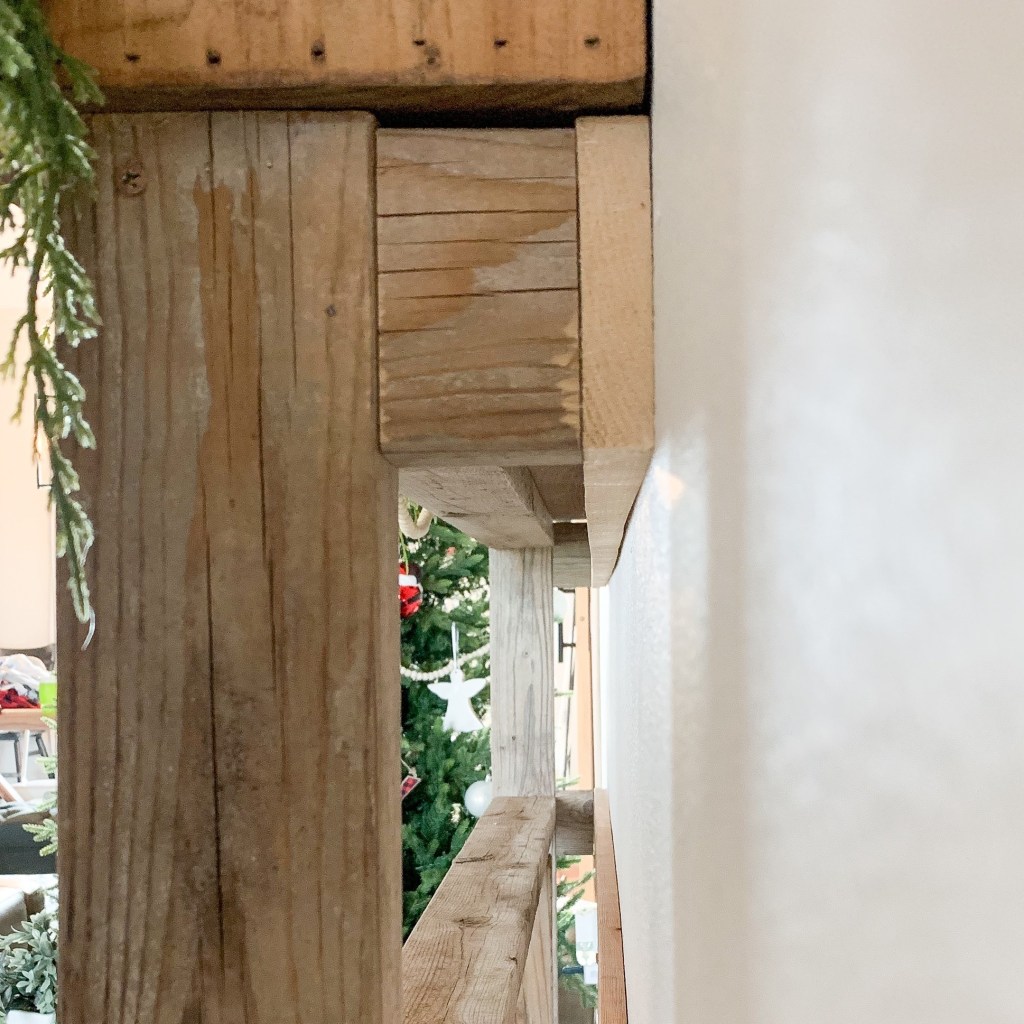
Once the mantle was hung I attached 3 1x4s to the wall and made sure to hit my studs. The frame that will support the fireplace insert will be attached to these 1x4s.
Now it was time to figure out my measurements. I won’t get into specifics here because as previously stated it will all depend on your preferences/needs/space. I knew I wanted a shiplap mantle – and to keep the cost down I chose to do a faux shiplap (I’ll explain what that means later). Our fireplace essentially has 4 layers to take into consideration: the frame, a plywood backer, the faux shiplap & trim. When calculating your measurements be sure to take into consideration that lumber sizes often don’t indicate the actual dimensions of your boards. For example a 2×4 is NOT 2″ x 4″ – it’s actually 1.5″ x 3.5″.
Here’s the mockup I used to help me plan out all of my cuts. Having a visual reference really helped.

First up I built the frame out of 2x4s and wood screws. The owners manual for the fireplace insert should provide dimensions of the opening you’ll need for installation purposes. Additionally, I made sure to include extra boards on the bottom to help support the weight of the insert.
Once the frame was build I attached it to the wall using metal L brackets. This was a little tricky because of the tight spacing. If I were to do this again, I would have attached the back portion of the frame first, and attached the front portion after it was secured to the wall.
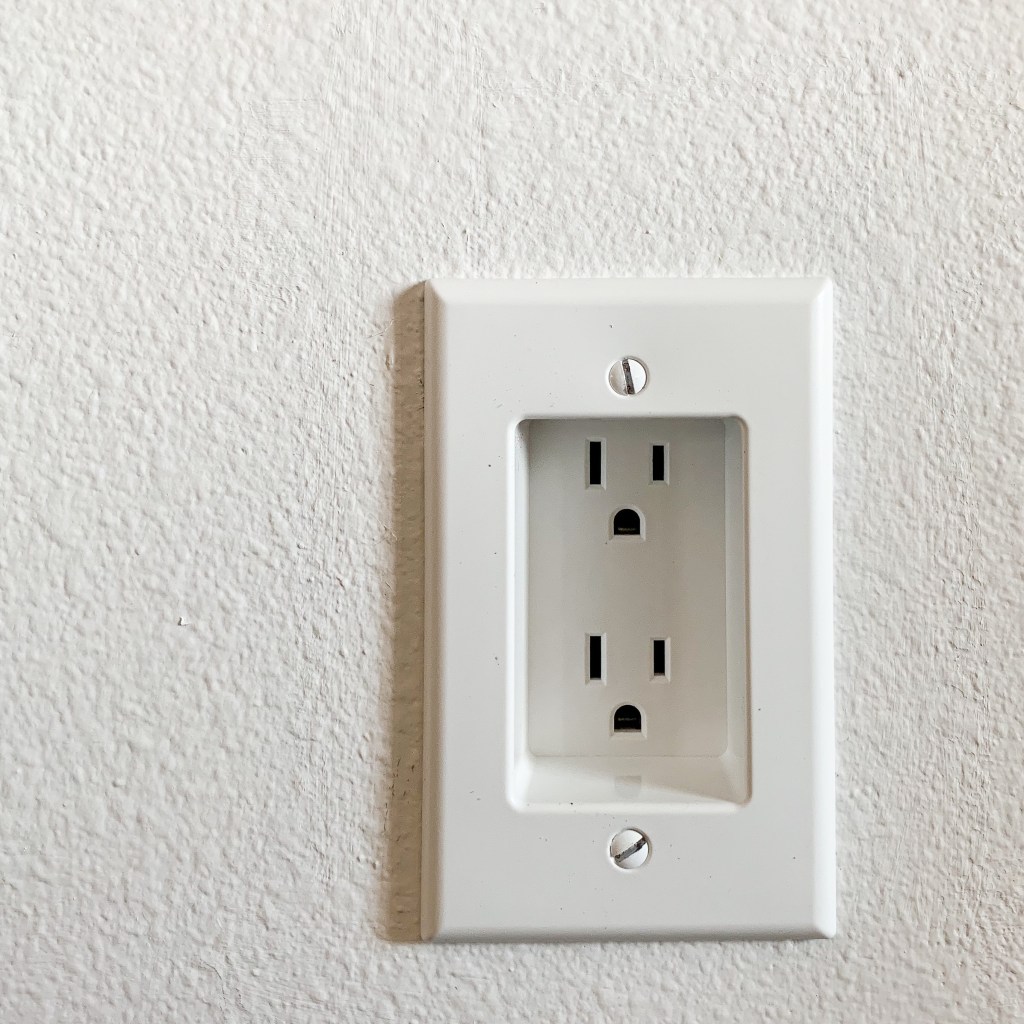
Once the frame was attached we tested the insert to make sure it fit. It did! However – there wasn’t enough clearance behind the insert for the power cord. We considered moving the outlet, but then found this recessed outlet at Home Depot. A quick switch and this solved our problem.
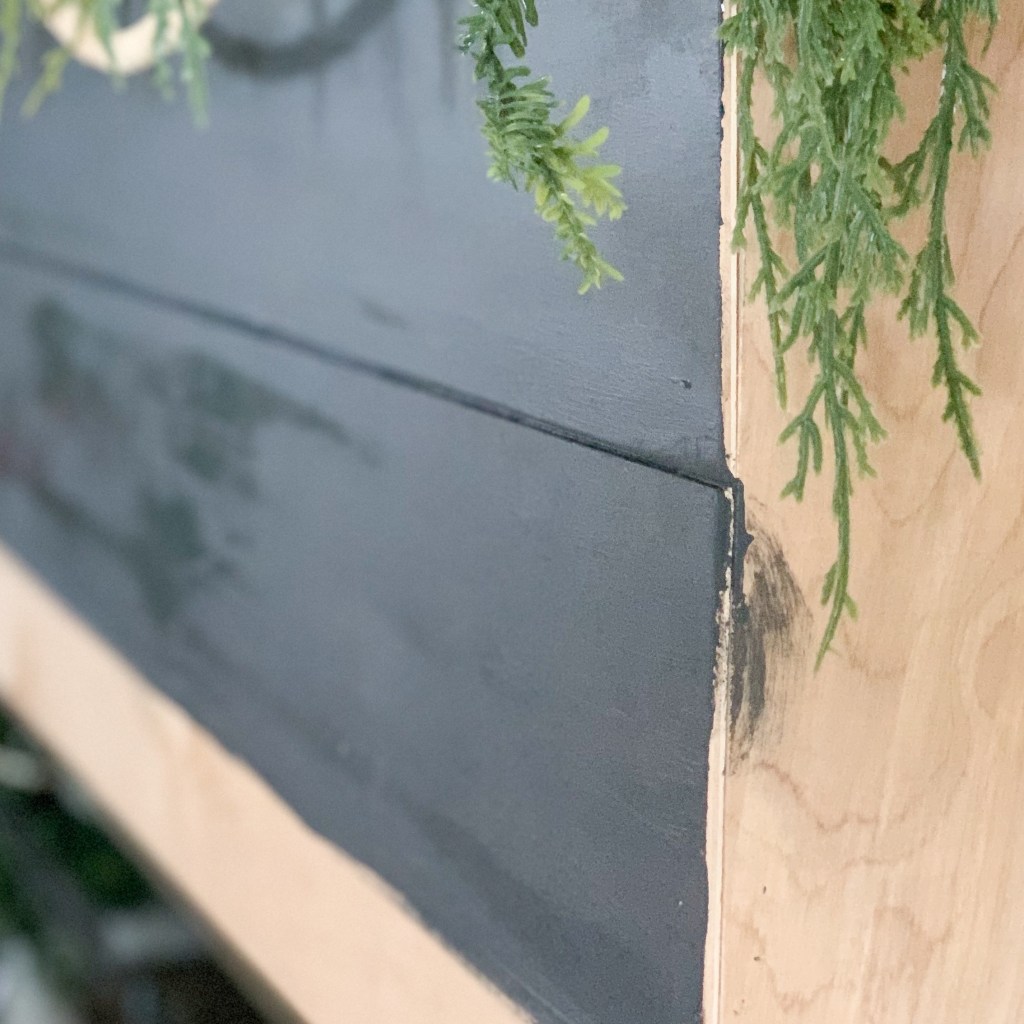
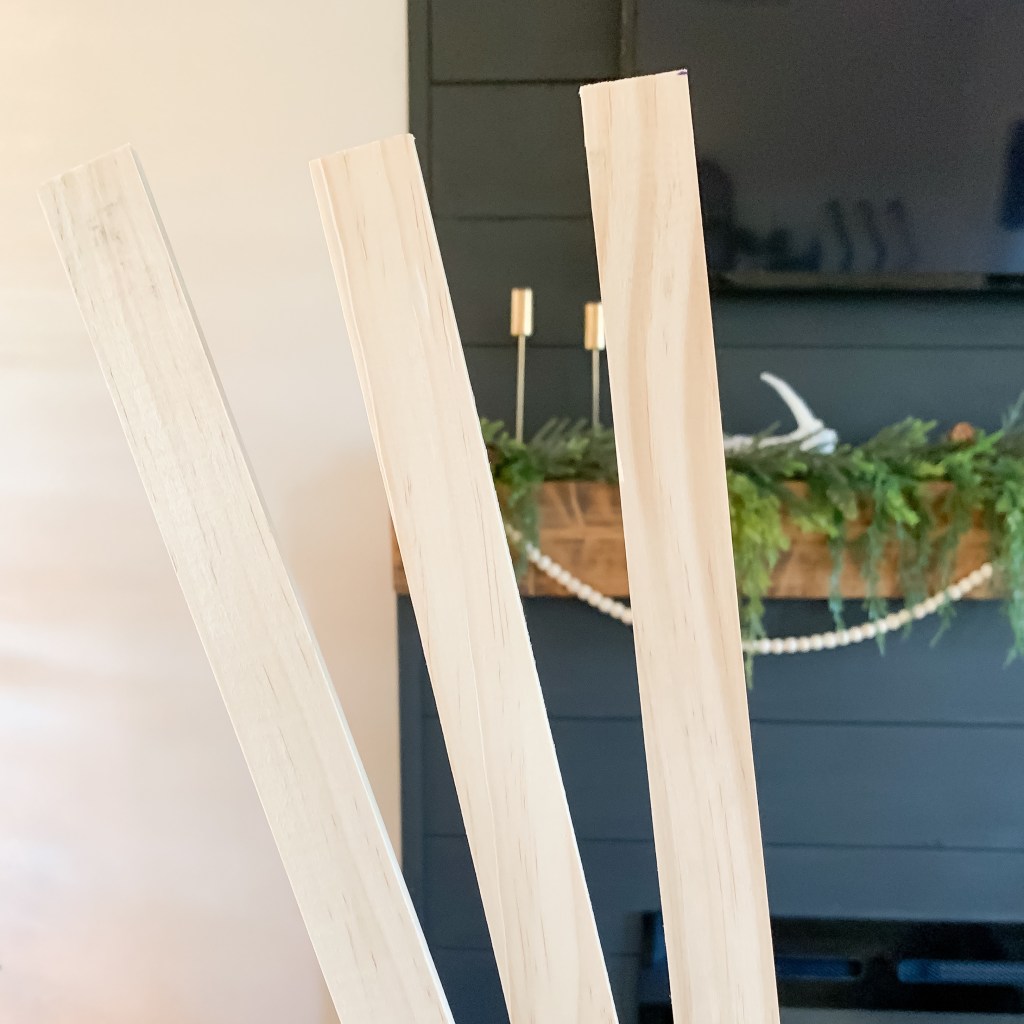
Next I applied a layer of 1/4″ plywood to the entire frame as a backer for my faux shiplap. Traditional shiplap are tongue in groove boards and only give the illusion of a gap when boards are placed next to each other. Because I’m not using a traditional shiplap, the backer board was necessary. Faux shiplap is generally plywood or MDF ripped into strips. We chose a 6″ wide board for our space.

Applying the shiplap was easy. Start at the top and work your way down placing nickels as spacers between each board. I used an 18 gauge brad nailer to attach them to the wall. It’s best to alternate the angle of your nails as you go to get the strongest hold. Trust me when I say: ALWAYS cut in with your stain or paint between attaching each board. This will save you a lot of time and frustration in the long run. If you forget, no worries! Grab a small paintbrush from the craft section and get to work.
Once your shiplap is applied and painted, you can give it a finished look with some trim! I used a little bit of lattice trim for the edges and a nice 1×3 around the base. I painted these boards prior to attaching them so I wouldn’t have to worry about taping.
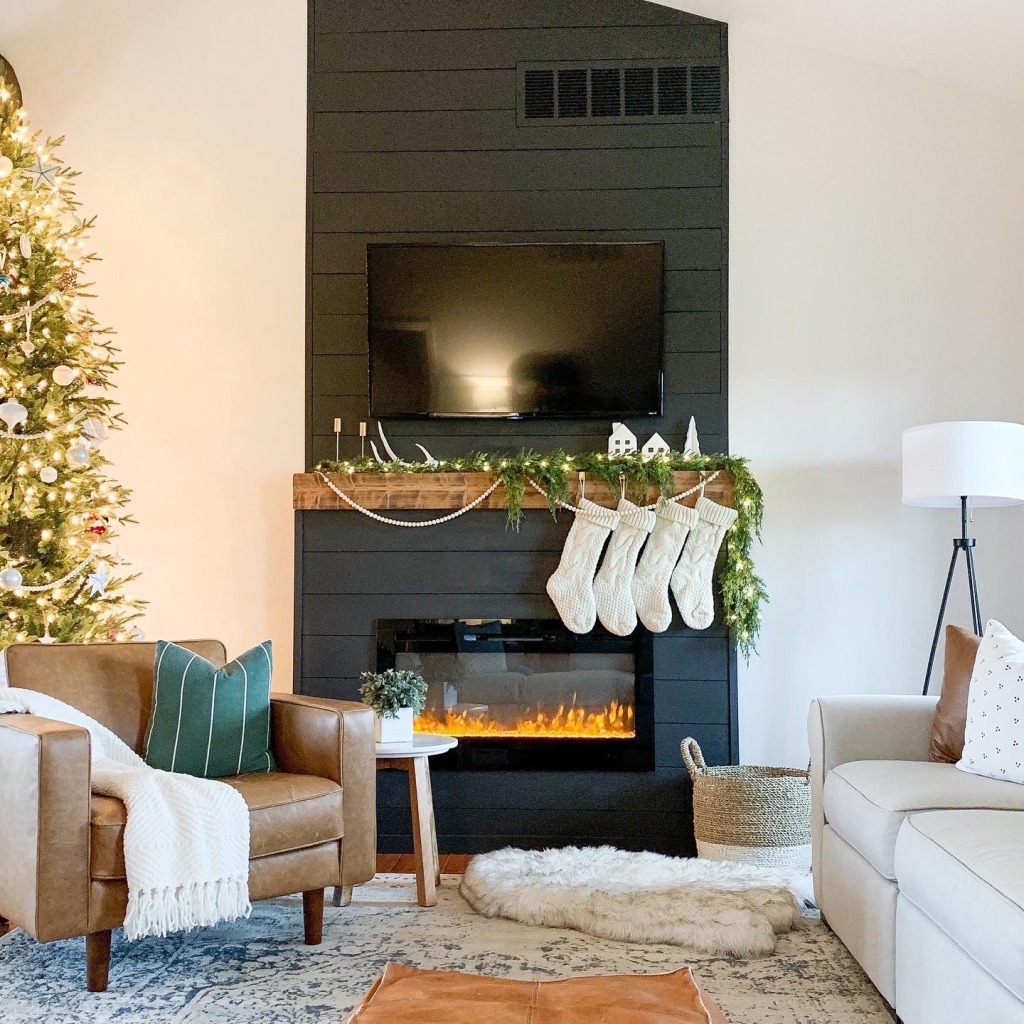
You could stop here! We chose to run our shiplap all the way to the ceiling 1. because we liked the way it looked and 2. because we have an intake vent that we wanted to hide! It worked perfectly. I used more lattice trim to give it a finished look.

Overall I am SO happy with how this project came together. Our living room finally has that cozy feeling and it transformed a huge blank wall into the focal point of our great room.

A few takeaways I have from this project are:
• Black Paint somehow gets EVERYWHERE.
• Make sure you have the correct saw blade when cutting plywood. Otherwise it splinters!
• Always cut in with paint or stain between your faux shiplap.
• Measure TWICE. In some instances 3 times!
Most importantly, be creative! Make this process your own and don’t feel like you have to make your space look EXACTLY like someone else’s. The best part of DIY is getting to make your home EXACTLY the way you want it. If you give this project a try, be sure to tag us so we can see!
Paint colors: Walls – Cameo White – Behr, Fireplace: Satin Black – Behr

Hi! This is beautiful! Where did your electronics go? Cable box, sound systems, etc.?
LikeLike
Thank you so much! We actually don’t have any of that stuff. We stream all of our TV services, no need for a DVD player or anything and no sound system although we are looking into adding a bluetooth soundbar. The TV has an outlet behind it that it’s plugged into and that’s about it.
LikeLike
I’ve seen people do these with storage inside the mantle (the front of the mantle flips down) or doors on the side with hidden storage!
LikeLike